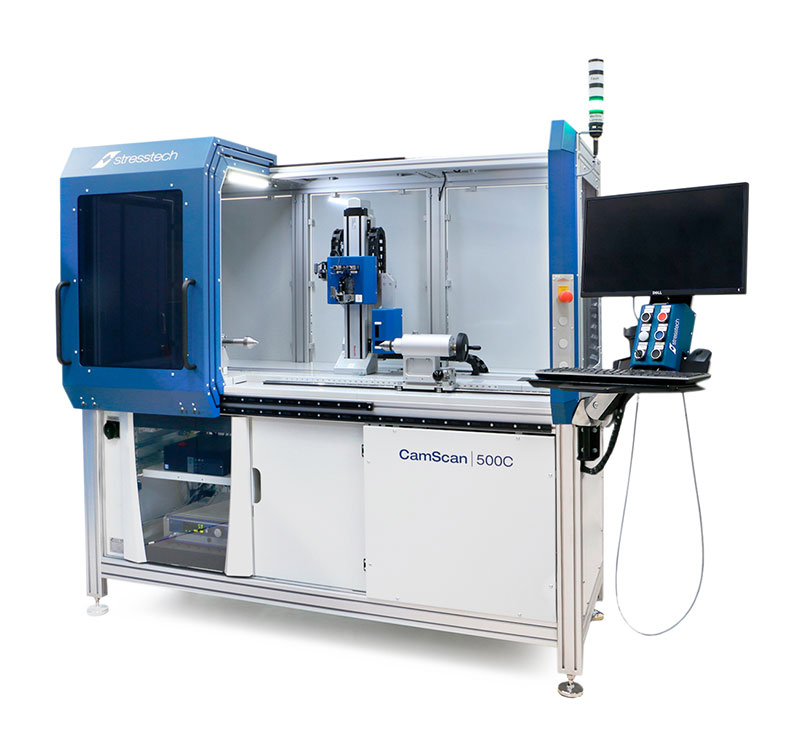
BNA


Would You like to receive a quote for BNA equipment?
Send a quick form, email at [email protected] or call at +48 32 614 12 29
Barkhausen noise analysis is a non-destructive method involving the measurement of a noise like signal induced in a ferromagnetic material by an applied magnetic field. There are two main material characteristics that will directly affect the intensity of the Barkhausen noise signal: hardness and stress.
The nature of Barkhausen noise was first described in 1919 by Prof. Heinrich Barkhausen. However, the method gained attention for industrial applications in the early 1980s from Dr. Seppo Tiitto and Dr. Kirsti Tiitto, the founders of Stresstech. Today, it is a recognized non-destructive method for materials characterization and heat treatment defect testing.
Barkhausen Noise - Phenomenon
In order to understand the BNA, the formation of Barkhausen noise must first be understood well. To create the Barkhausen noise (BN), an applied magnetic field needs to magnetize the sample; hence, BN is applicable only to ferromagnetic materials. Ferromagnetic materials are composed of magnetic domains which are separated from each other by domain walls.
In the absence of a magnetic field, magnetic domains are randomly oriented which makes the total net magnetization of the material zero. If the material is subjected to a magnetic field, the magnetic domains tend to align themselves in the direction of the magnetic field.
Under the applied magnetic field, domain walls move back and forth because the domain on one side of the wall increases its size while the domain on the opposite side of the wall shrinks. The domain which has an orientation closest to the applied magnetic field increases its size by expending the other domains which have different orientations than of the applied magnetic field. When the magnetic field is constantly increased, there is a point where the saturation is observed. In saturation, all of the magnetic domains become parallel to the applied magnetic field by orienting themselves.
When applied magnetization becomes zero again, magnetic domains try to go back to their initial alignments. However, the pinning sites which are precipitates, grain boundaries, inclusions, dislocations and small volumes of second phase material, slow down the domain wall’s movement. During domain wall movement, domain wall energy is spent to overcome the pinning sites. The abrupt jumps due to energy spending lead to sudden changes in the magnetization of the material. Even though the applied magnetic field changes smoothly, these so-called Barkhausen jumps are the reasons of the discontinuity that is directly observable in the hysteresis loop.
The changes in the magnetization induce electrical pulses which generate a noise-like signal called Barkhausen noise. Barkhausen noise, the irreversible jumps of domain wall over pinning sites, is called “noise” because of the sound heard from the speaker used in the original experiment.
Barkhausen Noise - Properties
Barkhausen noise provides information on the surface and a very close area beneath the surface. A Barkhausen noise signal has a wide power spectrum starting from the adjusted magnetizing frequency and ending above 2 MHz in most of the ferromagnetic materials. The effective depth of signal penetration is between 0.01 mm and 1 mm. The Barkhausen noise signal is damped due to skin effect which is caused by the opposing eddy currents induced by the changing magnetic field. An estimation of the penetration depth of the BN signal can be calculated using the following formula:
where δ denotes the penetration depth, μ represents the magnetic permeability, σ means the electrical conductivity and ƒ denotes the frequency of the alternating magnetic field.
Two important material characteristics will affect the intensity of the Barkhausen noise signal.
One is the presence and distribution of elastic stresses which will influence the way domains choose and lock into their easy direction of magnetization. This phenomenon of elastic properties interacting with domain structure and magnetic properties of material is called a “magnetoelastic interaction.” As a result of magnetoelastic interaction, compressive stresses will decrease the intensity of Barkhausen noise while tensile stresses increase it in materials with positive magnetic anisotropy (iron, most steels and cobalt). This fact can be exploited so that by measuring the intensity of Barkhausen noise, the amount of residual stress can be determined. The measurement also defines the direction of principal stresses.
The other important material characteristic affecting Barkhausen noise is the microstructure of the sample. This effect can be broadly described in terms of hardness: the noise intensity continuously decreases in microstructures characterized by increasing hardness. In this way, Barkhausen noise measurements provide information on the microstructural condition of the material. The microstructure of the sample directly affects the shape of the signal output as well. As an example, hard magnetic materials have wider and soft magnetic materials have narrower BN signal envelope shapes. Characteristic of the BN signal are amplitude, peak and width shapes which are affected by the microstructure of the sample and applied magnetizing field.
Barkhausen Noise - Measurement
Barkhausen noise measurement requires
- a main analyzer (Rollscan), model depending on the main use
- a Barkhausen Noise sensor developed for the component to be tested
- optional component handling equipment (stand)
- software for data acquisition (ViewScan) and analysis (MicroScan).
During the measurement, the sensor magnetizes and demagnetizes the sample in a cycle and picks ups the induced BN signal and transfers it to the main analyzer. Rollscan (the main analyzer) is the power source and digital signal processor. ViewScan or MicroScan are the software for real time data acquisition and reporting. Stands are custom made equipment for component handling.
Barkhausen Noise - Applications
Many processes such as machining (turning, milling, drilling, grinding), cold working (shot peening, laser peening, autofrettage), and case hardening (carburizing, nitriding, induction hardening) involve some modification of both stress and microstructure and can be readily analyzed with Barkhausen noise. Various dynamic processes such as creep and fatigue similarly involve changes in stress and microstructure and can also be monitored with Barkhausen noise.
Practical applications of Barkhausen noise method can be broadly divided into three categories:
- Evaluation of residual stresses
- Evaluation of hardness
- Testing surface defects
Evaluation of residual stresses
Barkhausen noise gives a response to the stress level of specimens. Barkhausen noise can be used for the evaluation of the stress state of materials. Tensile stress increases the Barkhausen noise signal amplitude and compressive stress decreases Barkhausen noise signal amplitude.
Cold working processes which are used to create complex compressive residual stress distributions at the surface layer can be characterized by Barkhausen noise. As an example, Barkhausen noise can be used to characterize and evaluate the effectiveness of shot peening process and improve the quality control process of shot peening. With Barkhausen noise, coverage and uniformity of the shot peening process can be inspected.
Measurement of residual stresses with Barkhausen noise is not a straightforward application since Barkhausen noise does not directly produce any MPa value results for stress state determination. However, with a calibration process, it can be done successfully and non-destructively. Evaluation of welding stresses is another practical application of Barkhausen noise.
Evaluation of hardness
Barkhausen noise can be used for the evaluation of the hardness state of the materials. Soft materials increase the Barkhausen noise signal amplitude and hard materials decrease Barkhausen noise signal amplitude.
Barkhausen noise can differentiate soft and hard parts from each other in a production line. It can easily match the production rates of most manufacturing lines, enabling real-time hardness control.
Testing of surface defects
Detection of grinding burns and grinding process control
Grinding burn is a common name for thermal damages which occur on the surface during grinding processes. Grinding burn causes local discolorations on the surface and it can soften or harden surface layers.
When the temperature is over the normal tempering range but below the austenization temperature (Ac3), slow quenching is applied to form a soft material that is called over-tempered martensite (OTM). The formation of OTM is known as retempering burn which creates tensile stress state and reduces the hardness on the surface.
When the temperature is above the austenization temperature (Ac3), rapid quenching is applied to form the untempered martensite (UTM) on the surface layer of the ground workpiece. The UTM layer is harder, prone to corrosion, sensitive to micro cracks and more brittle than the core of the workpiece and it changes the surface integrity and surface stress state into the tensile. The formation of the hard layer of martensite (UTM) is called rehardening burn which is another form of grinding burn.
Since Barkhausen noise gives the same response for both hardness and stress changes, different forms of grinding burns can be detected reliably.
Grinding processes can be controlled by monitoring the condition of the ground parts. 100% detection of grinding damage which occurs due to wheel wear, incorrect feed rate, wheel speed and other parameters can be made reliably by Barkhausen Noise Analysis.
100% detection of grinding burns is the most common industrial application of Barkhausen noise which is recognized by many organizations such as The Department of the Air Force, US Navy, SAE, FAA, AST and many more.
Detection of surface defects through Cr-coating
The detection of service-related thermal damages through chromium plate is a straightforward and reliable application for Barkhausen noise. The main application for detecting the surface defects through Cr-coating is landing gears of aircraft. During overhauling of the planes, using Barkhausen noise to detect surface defects through Cr-coating saves at least a week of time per part by preventing the unnecessary chrome stripping of parts such as axles, cylinders, and bores.
PRODUCERS OF EQUIPMENT AND SYSTEMS FOR BNA
Regarding BNA method Casp System Sp. z o. o. is the distributor of solutions from Stresstech company.

CONTACT
Our NDT specialists are at Your disposal.
In case of any questions regarding our offer please do not hesitate to contact us, our working hours are monday-friday, between 7:30 and 15:30
| Casp System Sp. z o.o. 43-603 Jaworzno, ul. Puszkina 2 NIP: PL 6321873261 | |
| +48 32 614 12 29 | |
| [email protected] |
DISTRIBUTION – ADAPTATION – IMPLEMENTATION – SERVICE
OF NDT EQUIPMENT AND SYSTEMS
A FEW WORDS ABOUT CASP SYSTEM SP. Z O.O.
CASP System company is a well known and respected supplier of equipment and systems from fields such as industrial automation, non destructive testing or research and development.
The company has several departments as well as widely used online stores Manometry24, Czujniki24, Przetworniki24, Enkodery24, Automatyka24, Eh24.pl. During latest years we have expanded our offer considerably and gotten a lot of experience, our personnel is well trained and specialized which is a definite strenght of our company in comparison to our competition. Our additional websites are: WzorceNDT and Aparatura Badawcza

The highest quality of the offered equipment and specialized measurement devices guarantees customer satisfaction and translates into numerous awards that we can proudly display below, for example:


